TypeScript Classes & Object-Oriented Programming
Posted by robert | Filed under TypeScript
Update: New and better Boilerplate that uses ES6 Modules in TypeScript check it out.
Full credit for this article goes to Peter Elst. I took a really old article of his and modified it to talk about TypeScript.
What is OOP
In object-oriented programming, developers often use the term “architecting an application.” This analogy is not far off the mark. You can approach any project as if you are its architect, and use object-oriented principles as building blocks to structure your code. As you develop your application, you can think of your code modules as the blueprints that form the foundation of your applications. Just as you can use one blueprint repeatedly to build similar structures, you can repurpose your code as needed to achieve your desired functionality.
The concept of classes is at the heart of all object-oriented code development. If you’re not already familiar with object-oriented programming (OOP), this article will get you started writing TypeScript classes. Writing classes has never been easier than with TypeScript. If you are new to working with TypeScript, you’ll find that writing classes allows you to create projects that are easier to manage and maintain.
The concepts covered in this article will help you begin writing more portable, reusable code and move beyond the world of procedural code.
What are classes?
Classes are nothing more than a collection of functions (called methods in this context) that provide a blueprint for any number of instances that are created from it. By changing some variables (or in OOP terminology, properties) of a class instance, or by passing different values as arguments to its methods, the same underlying class can have widely different outcomes.
The ability to generate multiple instances (that can appear and behave differently) from the same object is one of the reasons why classes are so powerful. Writing TypeScript classes promotes reusability because the functionality you create can be repurposed.
Let’s see how this looks in code:
class Brick {

    public color: string = 'red';

    constructor() {
        console.log(`new ${this.color} brick created`);
    }
}

export default Brick;
The Brick.ts class code above illustrates one of the most basic implementations of an TypeScript class. The class holds just a single method and property.
To use this class in another TypeScript we will need to import it and instantiate the class.
import Brick from './somepath/Brick';

const firstBrick: Brick = new Brick();
If you run the compiled TypeScript code which is JavaScript, you’ll see that the Console panel now displays “new red brick created” (see Figure 1).
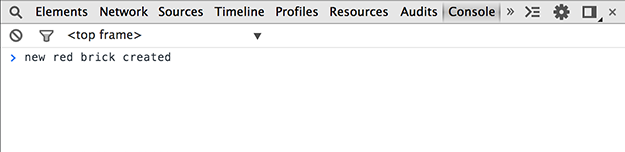
Figure 1. Console panel of Brick class getting instantiated
The console message in the Console panel means that your TypeScript class is functioning correctly. Now it is time to start doing some more advanced things with classes.
Basic OOP concepts: Inheritance vs. composition
There are just a handful of concepts at the core of OOP. This article covers the most important ones: inheritance, encapsulation, and polymorphism. I also discuss a few related topics to help you put these ideas into context.
Without a doubt, inheritance is the most well-known principle of OOP. Inheritance can be defined as the ability to inherit properties and methods and extend the functionality of an existing class in a new one.
If you’re thinking ahead, you might imagine creating a new “Wall” class that extends the “Brick” class you created earlier. However, that is not how inheritance works.
Looking at the relationship between a brick and a wall, the best way to code this is not through inheritance but rather by a concept called composition.
A simple rule of thumb determines whether the relationship between classes is one that warrants inheritance or composition. If you can say class A “is a” class B, you’re dealing with inheritance. If you can say class A “has a” class B, the relationship is one of composition.
Here are some examples of inheritance:
- Cat “is an” animal
- Engineer “is an” employee
- Rugby “is a” sport
Here are examples of composition:
- Wall “has a” brick
- Computer “has a” keyboard
- School “has a” teacher
So what is the difference in how inheritance and composition are implemented? Let’s compare how this works, starting with inheritance:
class Animal {

    public furry: boolean;
    public domestic: boolean;

    constructor() {
        console.log('new animal created');
    }

}

export default Animal;
The Animal.ts class code above is the base Animal class, which you will now extend using inheritance with a Cat class:
import Animal from './somepath/Animal';

class Cat extends Animal {

    public family: string;

    constructor() {
        super();

        this.furry = true;
        this.domestic = true;
        this.family = 'feline';
    }
}

export default Cat;
If you look at the Cat.ts class, the constructor assigns values to three different properties. On close inspection, only one of these properties (family) is defined in the Cat class. The other properties (furry and domestic) come from the Animal base class.
While this not exactly the most practical example, you can see how class inheritance allows you to build upon existing functionality to create a new blueprint for you to start using as you develop your project.
Now if you wanted to create half a dozen cats, you could simply do this by instantiating the Cat class, which has all the properties already set up, rather than using the generic Animal class and having to define the properties again and again for each instance.
Currently in TypeScript there is no override keyword to override a method defined in the class that you extended. You just create a new method with the same name to override the one in the class you extended.
On the other hand, composition doesn’t have any formal syntax like the extends keyword. Composition simply instantiates its own instance of any class it wants to use.
Let’s take the Brick class created earlier. In this next example you’ll create a Wall class that uses composition to instantiate instances of the Brick class:
import Brick from './somepath/Brick';

export class Wall {

    public wallWidth: number = 0;
    public wallHeight: number = 0;

    constructor(w: number, h: number) {
        this.wallWidth = w;
        this.wallHeight = h;
        this.build();
    }

    public build(): void {
        for (var i: number = 0; i < this.wallHeight; i++) {
            for (var j: number = 0; j < this.wallWidth; j++) {
                var brick: Brick = new Brick();
            }
        }
    }
}

export default Wall;
In the code above, the Wall.ts class accepts two arguments passed to its constructor, defining the width and height in bricks of the wall you want to create.
Let’s do a quick test of this class by instantiating it:
import Wall from './somepath/Wall';

const myWall: Wall = new Wall(4, 4);
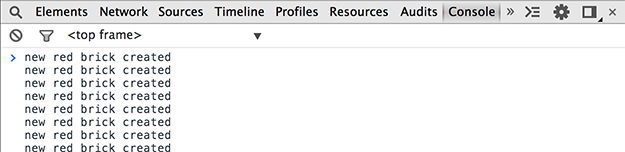
If you run the compiled TypeScript code which is JavaScript, you’ll see that 16 Brick instances are created with corresponding trace statements displayed in the Output panel to create a 4 x 4 wall (see Figure 2).
Output panel of Wall class getting executed Figure 2. Output panel of Wall class getting executed Apart from the difference in class relationship between inheritance and composition (as I discussed earlier), composition has the advantage of being able to add functionality to another class at runtime. It allows you to have control over the creation and destruction of class instances, whereas with inheritance the relationship between the classes is fixed and defined at the time the code is compiled.
Encapsulation
Now let’s move on to another important principle of OOP called encapsulation. The underlying concept of encapsulation deals with what methods and properties your class exposes to the outside world.
Up until this point you’ve always set methods and properties as public, but is that really what you’d want to do?
If you want your code to be stable, and if you want to develop projects that are least prone to bug and errors, you’ll want to restrict the ways in which other classes can interact with your code.
The key here is to only have those methods and properties available that are required as settings for the class, and restrict access to the rest. Using this approach, you’ll have a limited number of places in your code to debug when something goes wrong in the interaction with your class.
TypeScript includes the following keywords as access modifiers to methods and properties:
- public
- allows access from anywhere
- private
- can only be accessed within its own class
The keyword below is current not in TypeScript but I do hope it is added soon:
- protected
- can only be accessed within own class and subclasses
Let’s put this concept into practice. Take a look at the following example:
export class Person {

    private _age: number = 1;

    constructor() {

    }

    public get age(): number {
        return this._age;
    }

    public set age(val: number) {
        if (this._age > 0) {
            this._age = val;
        }
    }

}

export default Person;
Note: TypeScript supports getter and setter methods but some older browsers do not support the compiled JavaScript code. To learn more check out my TypeScript Getters Setters with TypeScript Accessor Tutorial.
The code example above shows a Person.ts class with a private property _age of a Number type. Even though you want to allow the age of the person to be set, you still opted not to use a public property here. Instead you are routing the age value through the use of a getter/setter method.
Getter/setter methods (as implemented in the previous example) appear as if they are properties, but they behave like methods.
When you set the age property, it calls the age setter method that assigns the value to the private _age property after validating it. In this case, you know that a person’s age can’t be a negative value.
The major advantage of this approach is that every time the age property is set, validation occurs because the age value is always routed through the setter function.
Polymorphism
The final concept I cover in this article is polymorphism. The concept behind polymorphism is based on the idea of different classes implementing the same method names.
Even though this is a very simple concept, polymorphism has some interesting implications. The first major advantage is that it allows classes to be interchangeable at runtime. There are no hard-coded references to specific method names for specific classes.
For example, imagine you have a Teacher class and a Student class. You could implement a teach method for the teacher and a study method for the student, but polymorphism allows you to write the code so that the two classes both implement a work method. Although a Teacher and Student class will clearly have a different implementation of a work method (one teaches, the other studies), you can use a shared generic method name, creating a single interface through which they can be accessed:
class Teacher {

    public work(): void {
        console.log('I am teaching');
    }

}

export default Teacher;
class Student {

    public work(): void {
        console.log('I am studying');
    }

}

export default Student;
Any class that gets passed an instance of either the Teacher.ts or Student.ts class does not need to do any type checking to determine whether it is dealing with a teacher or a student instance (or any other class implementing the same methods for that matter) but it can directly call the work method.
You can enforce polymorphism between classes through the use of something called interfaces. These are similar to classes in that they define a set of methods, but interfaces are different than classes because they do not have an implementation. Interfaces simply define a “contract” of the methods a class needs to implement in order to be valid.
Here’s an example of an interface called IWork:
interface IWork {
    work(): void;
}

export default IWork;
As you can see from the IWork.ts code above, an interface looks suspiciously like any other class. But there are a few differences. Most developers choose to name an interface name so that it begins with a capital I (a common naming convention for interfaces, although it is optional). Also, instead of a class keyword, interfaces use the interface keyword. Additionally, as you analyze the code, you’ll see that in the section where you would expect to see some code for the work method, only its method signature is defined.
The interface above requires that any class that implements it must have a method called work that has a return type of void.
Let’s see how the Teacher and Student class implement this interface:
import IWork from './somepath/IWork';

class Teacher implements IWork {

    public tenure: boolean;

    constructor() {
        this.tenure = true;
    }

    public work(): void {
        console.log("I am teaching");
    }

}

export default Teacher;
import IWork from './somepath/IWork';

class Student implements IWork {

    public averageGrade: number;

    constructor() {
        this.averageGrade = 4.07;
    }

    public work(): void {
        console.log('I am studying');
    }

}

export default Student;
That was easy. By simply adding the implements keyword, you now have set up both the Teacher.ts and Student.ts classes so that they are required to implement the work method. If you try removing or renaming the work method from either of the two classes, you’ll receive a compile-time error message.
By having classes all implement a common interface, the interface can actually be used as a data type. Let’s look at the following example:
import IWork from './somepath/IWork';

class Supervisor {

    constructor(worker: IWork) {
        worker.work();
    }

}

export default Supervisor;
In the example above, you have a Supervisor.ts class that can be passed an instance of a class implementing the IWork interface. In this way, the interface is being used as a data type.
The TypeScript compiler knows that any class instance implementing this IWork interface will have the work method defined. Therefore, it doesn’t complain about a possibly undefined method when the code is compiled.
import Supervisor from './somepath/Supervisor';
import Teacher from './somepath/Teacher';
import Student from './somepath/Student';

const supervisor1: Supervisor = new Supervisor(new Teacher());
const supervisor2: Supervisor = new Supervisor(new Student());
If you run the compiled TypeScript code which is JavaScript, you’ll see two lines appear in the Output panel. The first line displays “I’m teaching” and the second displays “I’m studying” (see Figure 3). These console.log statements are, of course, exactly what you’d expect by passing a new teacher and student instance to the Supervisor constructor.
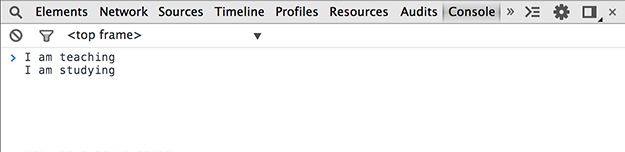
Figure 3. Output panel of the Supervisor class using polymorphism
Type casting
That brings up the next question: What happens when you try to access class-specific methods or properties of Teacher or Student (other than the work method) that weren’t defined in the interface?
The Supervisor class uses the IWork data type for any instance that is passed to its constructor so if you were to call any other method, the compiler has no way of knowing whether that is implemented. The compiler will report an error.
You can work around this is by using something called type casting by converting the instance from this generic IWork data type back to the Teacher or Student instance.
The way this is accomplished is by using the instanceof keyword and the “as” keyword to cast the object:
import Teacher from './somepath/Teacher';
import Student from './somepath/Student';
import IWork from './somepath/IWork';

export class Supervisor {

    constructor(inst: IWork) {
        inst.work();

        if (inst instanceof Teacher) {
            const teacher = inst as Teacher;
            console.log('Has tenure:', teacher.tenure);
        }

        if (inst instanceof Student) {
            const student = inst as Student;
            console.log('Average grade is:', student.averageGrade);
        }
    }

}

export default Supervisor;
In the code above, the instanceof keyword checks whether the worker instance passed to the constructor is of the specific type Teacher or of the type Student.
If it is a teacher instance, you are able to type cast the instance to that specific class by using “as” keyword, so you can access its specific methods and properties. In this case you could, for example, have a Boolean tenure property set in the Teacher class.
The same holds true if we’re dealing with a student instance. If the is keyword confirms that you are working with a student, you can type cast the generic IWork instance to a student instance and access the averageGrade property.
This is a very useful behavior. You can see how using polymorphism in this way benefits your projects when you have a collection of classes that need to accept any number of data types, as long as they implement a common interface. When you need to get into the specific method implementations of the class implementing the interface, type casting makes this possible.
To check out an example of OOP and TypeScript check out an older post of mine Object Oriented Programming with TypeScript Tutorial.
Files for this example can be found at: https://gist.github.com/codeBelt/65a82e76597f2fb6c2af You can use the follow command to compile the example code:
tsc TestApp.ts -out app.js
Original Article written by Peter Elst (source)
December 3, 2015 at 12:25 pm
As a guy that has worked with javascript but is now required to work in an object oriented way (which i’ve never done), this couldn’t be more helpful, thanks. Only doubts that remained are:
If
public work():void {(something)}means that the function is expected to return nothing, then if I expect it to return a string for instance, would I writepublic work():string {(something)}And, what’s the meaning of the ‘super()’ keyword you used in the constructor of the cat class?
December 6, 2015 at 1:29 pm
The example below doesn’t retrun anything. Notice that there is no ‘return’ keyword at the bottom of the method.
public work():void {

    // This method doesn't return anything.

}
Notice that there is a ‘return’ keyword at the bottom of the method. That is how you tell the method to return something.
public work():string {

    var str = 'This is the string you are returning';

    return str;

}
super() is only need in the constructor when you extend another class. Cat extends Animal Basically this is calling the constructor of the Animal class so that your Cat class inherits all the functionality from the Animal class.